Rugby is one of New Zealand’s most physically demanding sports, and playing it week after week depends on preparation off the field as much as skill on it. This guide gathers the evidence-based habits that help players at every level — from Small Blacks juniors to senior club sides — lower their risk of injury, recover faster and enjoy longer careers. Everything below reflects current New Zealand Rugby (NZR) safety guidance and published research rather than gym-floor folklore, so you can separate what genuinely protects the body from what only sounds convincing.
Key Points
- RugbySmart is New Zealand Rugby’s compulsory annual safety programme for coaches and referees.
- A structured warm-up such as World Rugby’s Activate can cut match injuries by around 72% when done three times a week.
- Community rugby uses a below-the-sternum tackle-height law to reduce head contact.
- Concussion stand-down is a minimum of 21 days (19+) or 23 days (under-19), plus a graduated return to play.
- Strength work, sensible training load, good sleep and nutrition do most of the protective work.
Why prevention is built into the New Zealand game
In Aotearoa, safety is treated as a shared responsibility between players, coaches, referees and clubs. The cornerstone is RugbySmart, NZR’s national player-safety education programme, which is a compulsory annual requirement for every coach and referee in the community game. It covers safe technique, conditioning, concussion recognition and emergency planning, and it is one reason serious rugby injuries in New Zealand have trended down over the past two decades.
Prevention works best when it is proactive rather than reactive. “Pre-hab” — strengthening at-risk joints such as the ankles, knees and shoulders before pain appears — sits alongside good technique, sensible training loads and proper recovery. Building these habits early is a key part of long-term rugby training and player development in New Zealand.
| Prevention pillar | Focus area | Goal |
|---|---|---|
| Physical | Strength and mobility | Build tissue that can absorb and transfer force safely |
| Technical | Tackle and contact form | Reduce high-risk collisions through skill |
| Load | Training and match volume | Avoid the fatigue that precedes soft-tissue injuries |
| Recovery | Sleep and nutrition | Allow tissue repair and keep reactions sharp |
Warm-ups and movement preparation

Static stretching before kick-off is no longer considered the best way to prepare. Modern warm-ups raise muscle temperature, switch on the nervous system and rehearse match movements. The most researched structured option is Activate, World Rugby’s injury prevention exercise programme, which combines balance, strength and plyometric (jumping) drills. In a randomised controlled trial, completing the roughly 20-minute routine three times a week cut match injuries by about 72% and concussions by about 59% compared with a traditional warm-up.
A large part of that benefit comes from improved proprioception — the body’s sense of where its joints are in space — which is the best natural defence against ankle sprains and knee ligament tears. Layering agility work on top helps too; our guide to speed and agility training explains how to build change-of-direction control safely.
The phases of a good rugby warm-up
An effective warm-up builds gradually in intensity so the heart rate is elevated and the brain is “switched on” for the technical demands of the game, such as catching a high ball or hitting a ruck at speed.
- Aerobic activation: light jogging and skipping to lift core body temperature.
- Dynamic stretching: leg swings, lunges and hip openers to switch on the glutes and hamstrings.
- Neural priming: short accelerations and footwork drills to wake up the nervous system.
- Contact readiness: controlled shoulder contact and get-up-off-the-ground “reloads”.
| Warm-up phase | Approx. duration | Primary benefit |
|---|---|---|
| Activation | 5 min | Increases blood flow to major muscle groups |
| Dynamic | 7 min | Improves range of motion and joint stability |
| High intensity | 5 min | Prepares the nervous system for explosive efforts |
Strength training as body armour

Resistance training builds the “armour” that lets a body tolerate collisions: a stronger muscle can absorb more force before it fails. Kiwi programmes prioritise the posterior chain — hamstrings, glutes and lower back — because it drives both power and protection. Eccentric exercises such as the Nordic hamstring curl, which trains the muscle as it lengthens under load, are strongly supported by research for reducing hamstring strains. A well-planned block of structured strength training is one of the highest-value investments a player can make.
Neck strengthening deserves special mention. Studies have linked dedicated neck programmes with fewer concussions and cervical-spine injuries, which is why isometric neck holds are standard for forwards who absorb repeated force in the scrum and at the breakdown.
Key movements for resilience
Gym work for rugby is about functional resilience, not bodybuilding. Compound lifts that move several joints at once teach the body to work as one unit during contact.
- Back squats: lower-body strength and leg-drive power.
- Deadlifts: the pulling strength needed to jackal and clear rucks.
- Nordic hamstring curls: targeted protection against hamstring tears in sprints.
- Rows and face pulls: upper-back strength that stabilises the shoulder in tackles.
| Exercise | Main area | Prevention goal |
|---|---|---|
| Nordic curls | Hamstrings | Fewer tears during high-speed running |
| Weighted step-ups | Glutes / knees | Better knee alignment and control |
| Isometric neck holds | Cervical spine | Head stability in contact |
Safe tackle technique and the lower tackle height law
Technique is one of the strongest protective factors in the game, for the tackler as much as the ball carrier. Since 2023, New Zealand has run a lowered tackle-height law across all community rugby: the first tackler must make contact below the sternum and aim for the belly area. The change is designed to reduce head-to-head and head-to-shoulder contact, the leading mechanism for concussions, and early NZR analysis found high player understanding of the reason behind it.
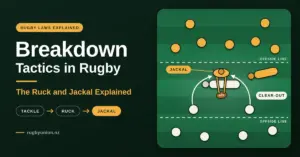
Good tackle mechanics start with body position: track the ball carrier with short, balanced steps, keep the spine neutral and place the head to the side — never in front. Knowing how bodies arrive and compete at the tackle also helps; our breakdown of how players contest the breakdown shows why safe body height matters after the tackle too.
Head placement and a safe technique
Correct head placement is the difference between a dominant tackle and a trip to the emergency department. Players are coached to keep the head behind or to the side of the ball carrier and to drive with the legs rather than reaching or diving.
- Head to the side: position it behind or beside the ball carrier, never in the line of contact.
- Active wrap: use the arms to bind and pull, which stabilises the tackler’s own body.
- Leg drive: keep the feet moving through contact so you are not run over.
- Low and legal: bend at the hips and knees to make contact below the sternum.
| Tackle element | Correct action | Injury reduced |
|---|---|---|
| Head placement | Behind or to the side | Concussion, facial injuries |
| Body height | Contact below the sternum | Head clashes |
| Arm bind | Firm wrap and squeeze | Shoulder and AC-joint injuries |
Concussion, the Blue Card and returning safely
Concussion is a brain injury and must be managed conservatively. New Zealand’s Blue Card initiative lets a trained referee remove any player showing suspected concussion signs; that player cannot return to the match, and there is no right of appeal. NZR’s guiding principle is simple: if in doubt, sit them out. Provincial unions decide which grades the Blue Card applies to, and in New Zealand the cost of the medical clearance examination is covered for players who receive one.
The minimum stand-down after a diagnosed or suspected concussion is 21 days for players aged 19 and over and 23 days for those under 19, and only after symptoms have cleared. Players first complete a graduated return to learn or work, then progress through a medically guided Graduated Return to Play (GRTP), moving from light aerobic exercise to non-contact drills and finally full contact. These are minimums — some players need longer at each stage.
| GRTP stage | Activity allowed | Condition to progress |
|---|---|---|
| 1. Rest and recover | Relative rest, return to learn/work | Symptom-free at school or work |
| 2. Light aerobic | Walking, light cycling | No return of symptoms |
| 3. Rugby-specific | Running and non-contact drills | Medical clearance before contact |
| 4. Full contact | Normal training, then play | Completed minimum stand-down |
Managing training load and fatigue
Many soft-tissue injuries strike when a player is fatigued and tissue has not had time to adapt. Sharp spikes in workload — when the amount of running and contact in a given week jumps well above what the body is used to over the previous month — are associated with a higher injury risk. Provincial academies use GPS units and wellness questionnaires to monitor this, but the same principle applies at club level: increase load gradually and schedule genuine recovery.
Young Kiwi players are especially exposed because many represent school, club and representative sides at once. Coaches communicating about a player’s total load — rather than each treating their session in isolation — is one of the simplest ways to prevent overuse injuries.
- Training volume: track total minutes on the feet each week.
- Contact load: limit full-contact “live” reps in training.
- Sleep: prioritise consistent, quality sleep for tissue and hormonal repair.
- Rest days: keep at least one, ideally two, full days off per week.
| Fatigue sign | Sensible action | Prevention outcome |
|---|---|---|
| Persistent soreness | Light movement, extra recovery | Fewer muscle strains |
| Drop in speed or power | Reduce training volume | Avoids nervous-system burnout |
| Poor sleep or mood | Add a full rest day | Sharper focus and safer contact |
Fuelling, hydration and recovery

What a player eats and drinks directly affects tissue integrity. Dehydration reduces coordination and muscle elasticity, making strains more likely late in a match, while adequate protein supplies the building blocks to repair muscle damaged in contact. General sports-nutrition guidance suggests active players spread protein across the day and refuel with carbohydrate and protein after hard sessions. New Zealand staples such as lean beef, dairy, fish and kumara make this straightforward.
Recovery is proactive training, not time off. Sleep and consistent nutrition deliver the bulk of the benefit; sensible extras include active recovery, compression and contrast (hot/cold) therapy. For a deeper look at what elite players actually do, see the recovery techniques used by the pros.
| Recovery lever | How often | Key benefit |
|---|---|---|
| Quality sleep | Daily | Systemic and hormonal repair |
| Post-session fuel | After training/matches | Replenishes energy and repairs tissue |
| Active recovery | Day after a game | Reduces stiffness and heavy legs |
Boots, mouthguards and protective gear
The right gear is a simple but real layer of protection. New Zealand grounds swing from rock-hard in late summer to boggy in mid-winter, so stud choice matters: long studs on firm ground raise the risk of ankle rolls, while moulded soles on a wet field invite slips that cause groin and hamstring strains. Carrying two pairs and matching them to conditions is a low-effort win — our guide to choosing the right rugby boots breaks down the options.
Mouthguards have been compulsory in all grades of domestic New Zealand rugby since 1998, and dental claims fell sharply — by roughly 47% — after the rule came in; a custom, dentist-fitted guard offers the best fit and protection for teeth and jaw. It is worth being clear about limits, though: padded headgear helps prevent cuts and cauliflower ear but does not prevent concussion, and shoulder padding cushions minor knocks without stopping dislocations.
Injury Comparison
| Common injury | Typical cause | Main prevention |
|---|---|---|
| Hamstring strain | High-speed running when fatigued | Nordic curls, warm-up, load management |
| Ankle sprain | Rolling on uneven or hard ground | Balance/proprioception drills, correct studs, taping |
| Knee ligament (ACL/MCL) | Twisting, poor landing or awkward contact | Strength and landing mechanics, glute/knee control |
| Shoulder / AC joint | Poor tackle position, direct impact | Upper-back strength, active-wrap technique |
| Concussion | Head contact in the tackle | Low tackle height, neck strength, Blue Card removal |
The mental side of staying injury-free
The mind is an underrated part of injury prevention. Players carrying high life stress or mental fatigue tend to react more slowly and end up in compromised body positions, which raises injury risk. A short, consistent pre-match routine, some focused breathing and honest conversations with coaches about workload and stress all help a player arrive calm, alert and physically safer.
Disclaimer
This article is general information about injury prevention in rugby and is not medical advice. It does not replace assessment by a doctor, physiotherapist or other qualified health professional. If you are injured or suspect a concussion, stop playing and seek medical care, and follow the official New Zealand Rugby and ACC protocols and your provincial union’s rules. Always consult a professional before starting a new training, nutrition or return-to-play programme.
Sources
- New Zealand Rugby — The Blue Card process
- New Zealand Rugby — Community Concussion Management Protocols
- New Zealand Rugby — Concussion FAQs
- Rugby Toolbox — RugbySmart
- New Zealand Rugby — Game innovations (tackle height)
- World Rugby — Activate injury prevention exercise programme
- World Rugby — Lower tackle height law trials for community rugby
Frequently Asked Questions
What is the best way to prevent hamstring tears in rugby?
Eccentric exercises such as the Nordic hamstring curl are the most strongly supported tool, ideally combined with a structured warm-up like World Rugby’s Activate programme and a gradual build-up of sprint volume.
How long is the mandatory concussion stand-down in New Zealand?
The minimum stand-down is 21 days for players aged 19 and over and 23 days for those under 19, starting only once symptoms have cleared. Players must complete a graduated return-to-play process under medical guidance, and some need longer.
Does headgear prevent concussions?
No. Padded headgear reduces cuts and cauliflower ear but does not stop the brain moving inside the skull during impact, so it does not prevent concussion. Safe technique, neck strength and load management are far more protective.
Are mouthguards compulsory for rugby in New Zealand?
Yes. Mouthguards have been compulsory in all grades of domestic New Zealand rugby since 1998. A custom, dentist-fitted guard gives the best fit and the best protection for the teeth and jaw.
What is the Blue Card and who can issue it?
The Blue Card lets a trained referee remove a player suspected of concussion from the field; that player cannot return in the same match and must follow the medical stand-down and return-to-play protocol before playing again.